Well, not exactly, not yet at least, but Oracle made it pretty clear : WLI will have a 9 year support but after that, clients will have to move toward BPEL PM. Knowing that WLI 8.1 is the most widely used version, that changes the whole situation since it will ceased to be supported … next year … (September 2011)
Then, from there, you’ll have two (Oracle) choices : either to migrate your application to WLI 10, or migrate your application to BPEL PM. The choice seems easy to make : “let’s go for WLI 10 !”. But it’s not that simple, since whatever the choice you make, you’ll have to modify or recode from scratch your app and if you go for WLI 10, you still will have to do the same later on, to move towards BPEL PM. To me, migrating to WLI 10 is just a way to slow down what’s unevitable.
With that in mind, what solution would you go for ?
I personally think that going right now toward BPEL PM is a smarter move and that’s why I’m about to demonstrate how to migrate a simple WLI process toward BPEL PM.
Note : I’ll start with a WLI process and then, we’ll see how to “translate” it into a BPEL fashion. I won’t spend much time talking about WLI, because I’m expecting readers to know a bit about it. This blogpost will mainly focus on the BPEL part.
1) Designing a simple WLI process
No fancy stuff : our process will just wait for two messages to arrive, before going further.It’s a really common stuff WLI is excellent at ! Thanks to its message broker, it adds a very handy layer to handle your messages.
Our messages will be defined according to the following XSD :
<?xml version="1.0"?><xs:schemaxmlns:xs="http://www.w3.org/2001/XMLSchema"xmlns:tns="http://temp.openuri.org/WLIMigrationToBPEL/sample.xsd"targetNamespace="http://fr.mbutton.blog/WLIMigrationToBPEL"elementFormDefault="qualified"attributeFormDefault="unqualified"><xs:element name="message"><xs:complexType><xs:sequence><xs:element name="id" type="xs:string"/><xs:element name="label" type="xs:string"/></xs:sequence></xs:complexType></xs:element></xs:schema>
First comes our receiver process :
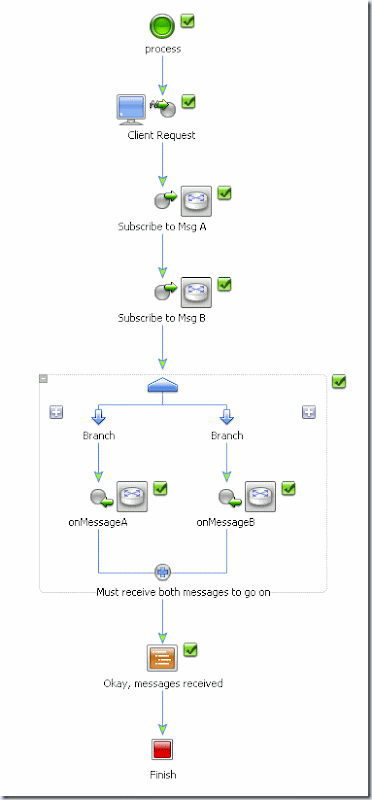
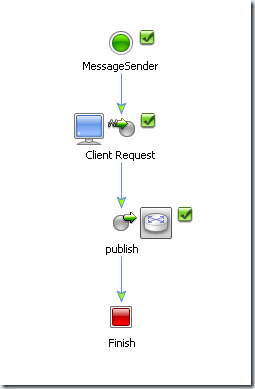
And then the “utility” process, we’ll use to send messages.
Note that we could have done a more sophisticated system based on JMS messages & an EventGenerator, but that’s beyond the scope of this article.
Once deployed, as expected, no running process is displayed in the WLI Console :

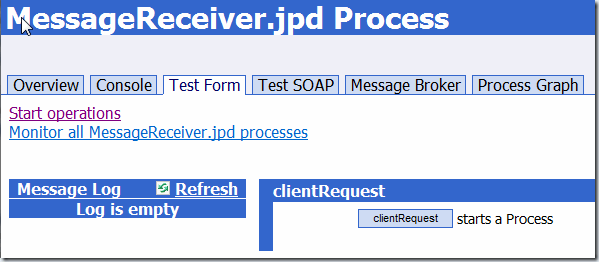
To do so, we just have to start the processes for testing. First one : the receiver.
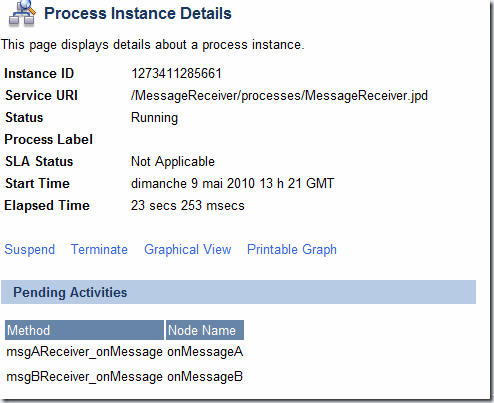
Now if we go back in the WLI console, we can now see that this process is running and waiting for some messages to arrive.
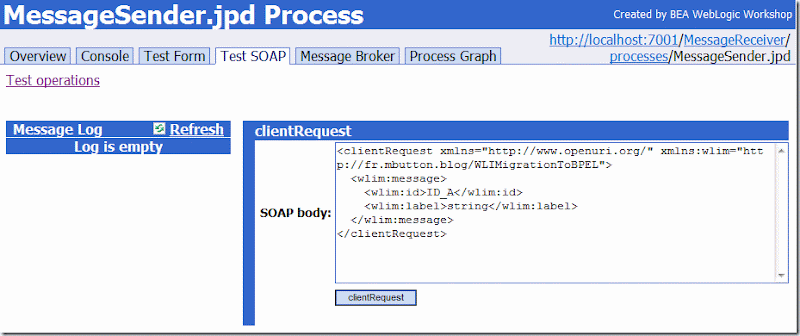
To complete it, we have to send two messages whose IDs are “ID_A” & “ID_B”.
Just call the sender process to do so :
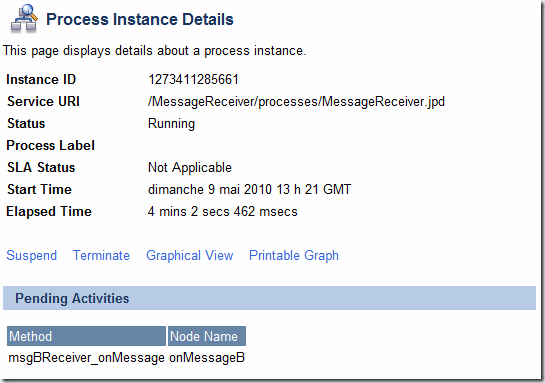
In the console, we can now see that’s the process has received the event and is no longer waiting for it :
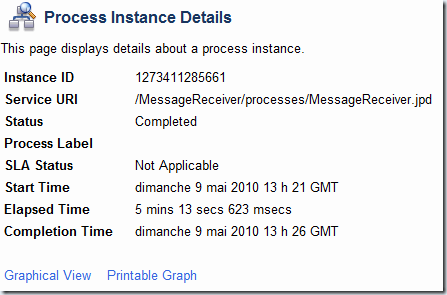
If we repeat that step with message B, it will complete the process :
Okay, our WLI process works fine, let’s do some more serious business.
2) Converting to BPEL
2.1) BPEL Export
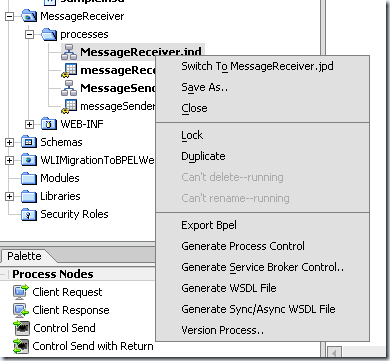
If you’re familiar with WLI, you should have noticed that an interesting option is proposed when you install the product : BPEL Export.
Let’s see what’s that option doing :
After the export has been done, you should see in the new BpelExport pane :

And some new files in the Application pane :
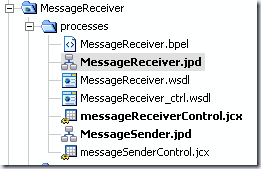
Let’s import the bpel files into JDev :

I have to say I’m impressed : I wasn’t expecting that kind of result. What I didn’t know, is that a BPEL process is not orchestrated like a WLI process. So, even if the graphical aspect is pretty much the same, that does not mean anything.
It’s just an empty shell and with three errors stating that some partnerLinks are missing …

If you’re not familiar with BPEL, that must be confusing. (and it was for me, when I first worked with BPEL PM !)
2.2) From scratch
The BPEL export is working but only converts the graphical view, which is not exactly what we wanted, especially since the product philosophies are different.
Then, we will start again, from scratch. And the only thing that will remain the same is the XSD we used.
2.2.1) Creating the composite
Note : To be able to develop quickly, I used (and am still using) the VM set up by Oracle which offers a full SOA Suite 11gR1PS2 environment (development & runtime) on RHEL 5. To get the (excellent) VirtualBox image, go to OTN.
First thing of all, we need to create a new SOA Project. You have to chose the composite template you want to start with.
As we are interested in BPEL, we may choose “Composite With BPEL Process”.
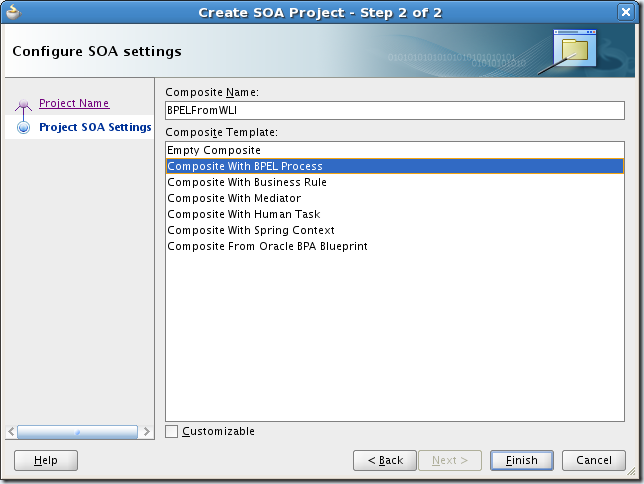
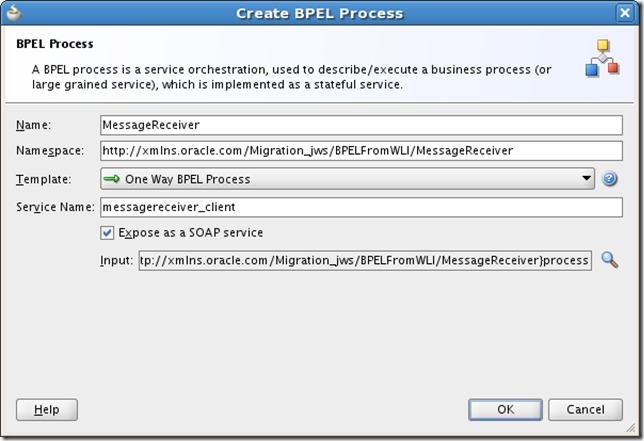
As we chose to create a BPEL process, a popup shows up, asking some details about the way we want to create it.
You can change the namespace, the name and the template (“Asynchronous”, “Synchronous” or “One Way”) or define it later. In our case, as there is no need for a return, just pick “One way”.
Then, import the XSD in the XSD folder of your SOA project.
2.2.2) Some explanations before the example
That’s where the fun begins. Coming from WLI, I designed something with the “WLI message broker” in mind : I thought my BPEL process would just listen to the desired messages (thanks to filters) and get them. But that’s not what happened.
In fact, the “WLI message broker” & the EDN (Event Delivery Network) are pretty different. Just think as a JMS topic : when a producer sends a message, all the consumers receive it. That’s the principle of the “WLI message broker” (this has been voluntarily simplified).
With EDN, even if a message, matching the filter you’ve defined in your BPEL process, arrives, you won’t receive it. Why ? Because you have to tell which instance is aimed. Lost ? We will see that in a few lines.
In our simple example, in which two messages are expected before being able to go on, you need to first define a correlationSet for the messages to know where to go. It might sound pretty weird, especially when you’re used to work with classical MOMs but don’t worry, it’s not that bad :)
Another thing you need to know is that for now, in the SOA Suite 11gR1PS2, there’s no way you can define two filters on the same message in a single BPEL process. I mean, you can do some tricks (such as defining several times the same event, with a different name) but I think this has been to be improved. Normally, it should be available next January, in the SOA Suite 11gR1PS3. For now, it’s easier to use a mediator to do the routing & filtering job.
Again, we will see that in our example.
2.2.3 ) Creating the Mediator
A mediator is a component whose role is to filter, transform and route messages within the SOA Suite (as opposed to the OSB, whose role is exactly the same, but outside the SOA Suite). In our example, the mediator is the component that will receive & filter EDN messages, and then route them to the good BPEL process route.
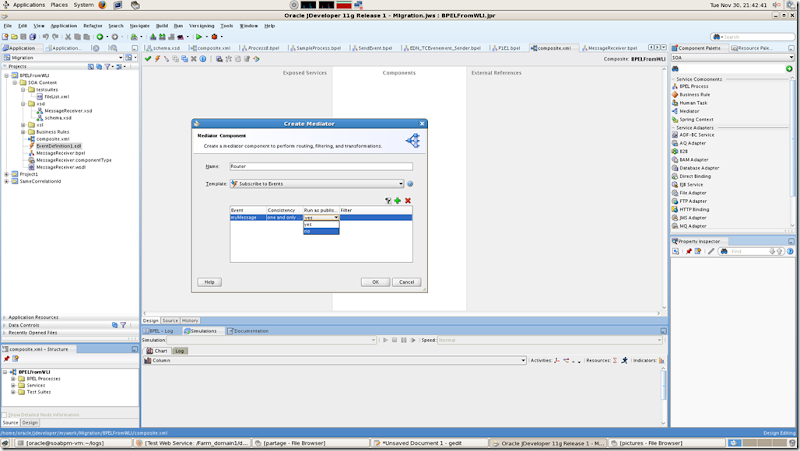
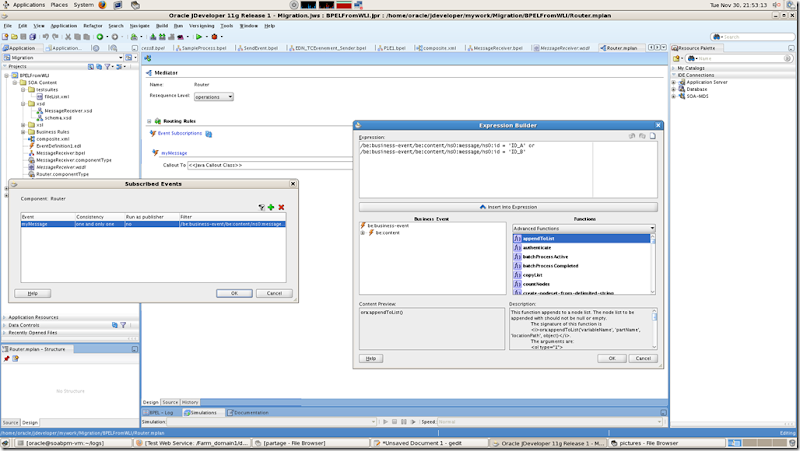
Note : I am sorry, but to limit the number of screenshots, I displayed all the cascading popups on a same screen. Just refer to the numbers to see in what order they’re displayed.
- Create a Mediator component by drag ‘n’ dropping a Mediator component (on the right) to the composite (in the middle), this will display window “1”
- Click on the “+”, this will bring the window “2”, in which you are asked to create an EDF (Event Definition File)
- Click once again on the “+”, to create your message. Windows “3” will show up.
- Click on the magnifying glass to chose your event (window “4”)
- Once again, click on the magnifying glass and select (in window '”5”) the type associated to the XML message
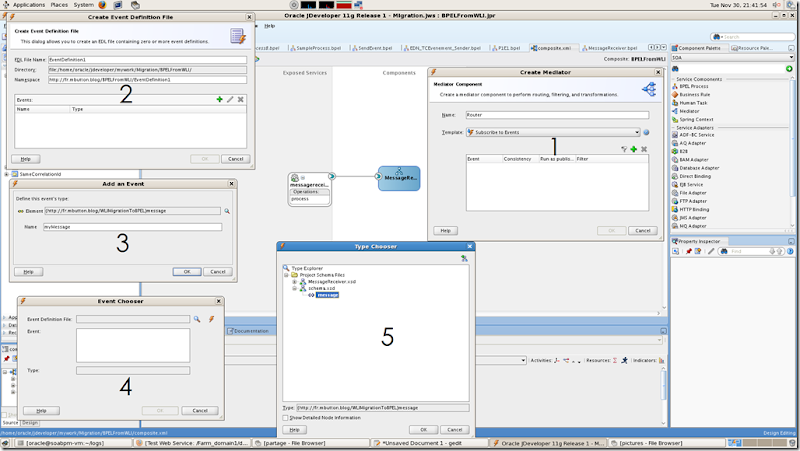
As the Mediator is not going to publish messages on the EDN, set the “Run as publisher” option to “No”.
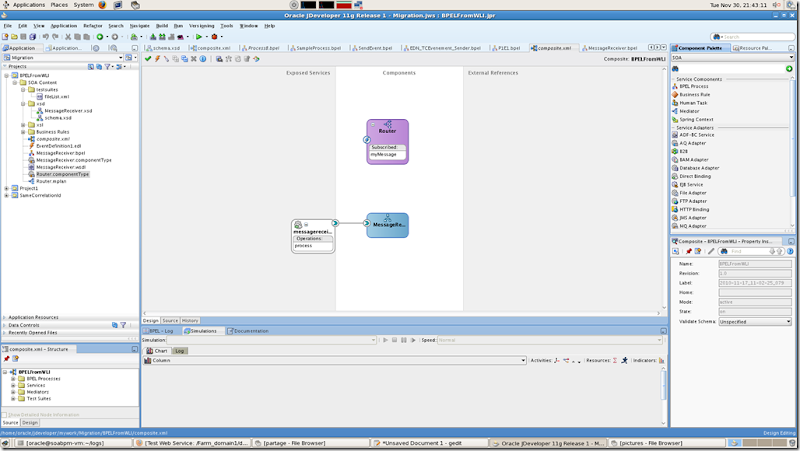
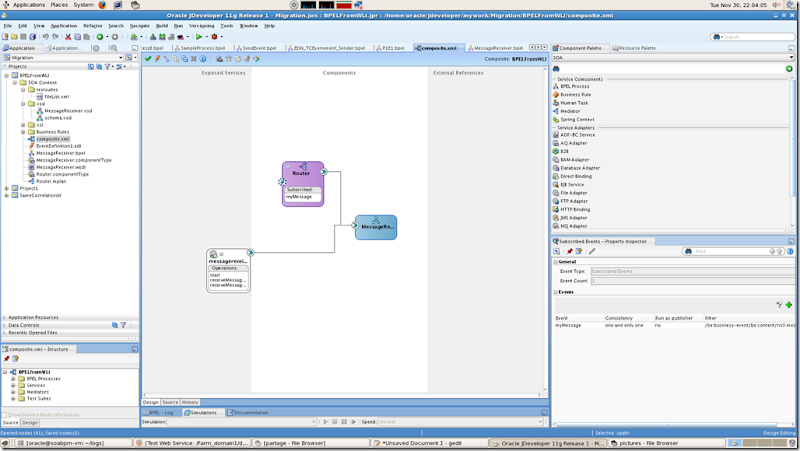
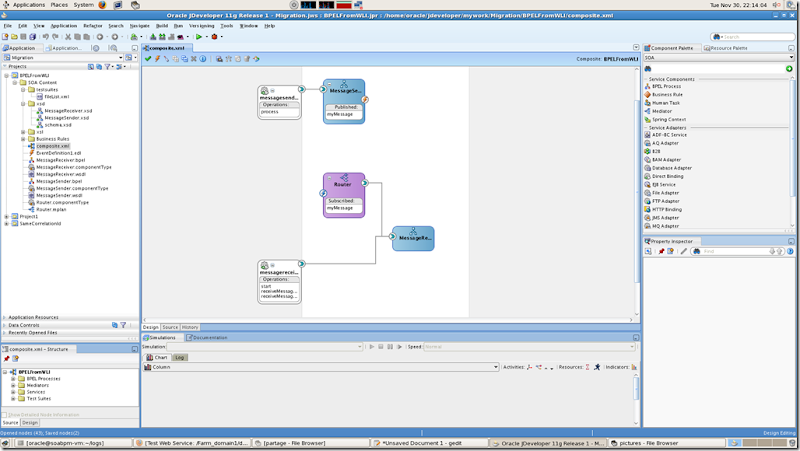
Here’s your Mediator (in purple) in the composite.
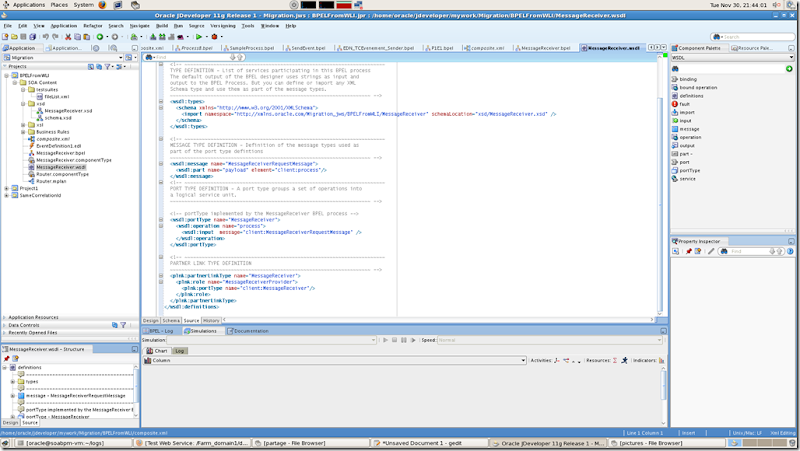
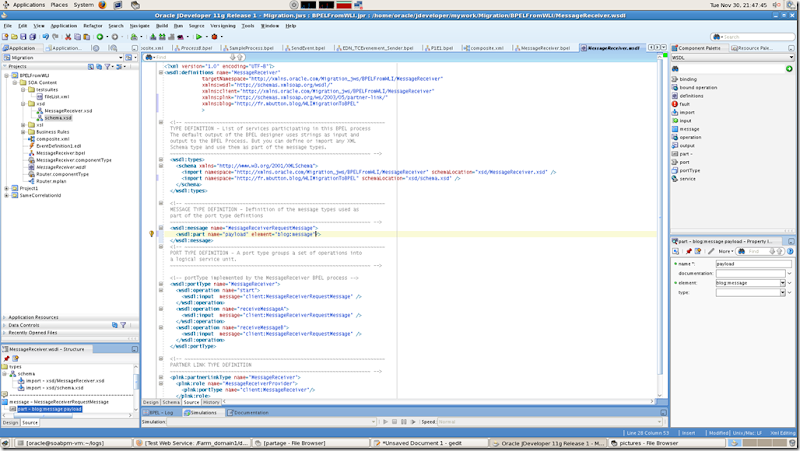
For the mediator to be able to route the messages, we must have three “listening branches” in our BPEL process. One to start the process and the two others to receive the expected messages. To do so, we have to update the WSDL of the BPEL process :
First, declare the message namespace (the one from your XSD) in the wsdl:definition tag. Then, import the namespace (wsdl:types tag).
After that, just update the definition of the message you will receive, in the wsdl:message > wsdl:part @element. (according to the prefix you have defined for your imported namespace, it should be yourNamespace:message. And finally, create operations so as to have three different operations (“start'”, “receiveMessageA” & “receiveMessageB”).
Our BPEL process seems ready. Let’s go back to the mediator : that’s not mandatory, but as it is cleaner, I want you to be aware of it : if we do not define a filter rule in the Mediator, it wll listen for each and every message, even if the static routing rules you have defined are not designed to process that message. Don’t worry, I will explain what a static routing rule is.
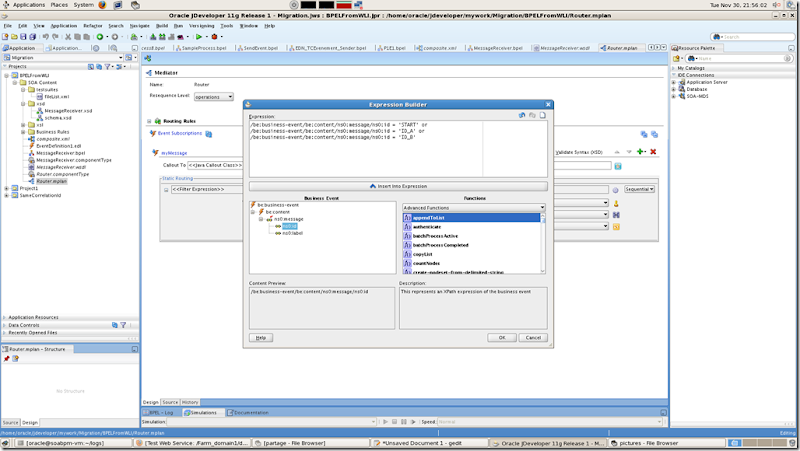
To define a filter, simply enter the correct expression knowing it allows logic expression (“or” & “and”), so you can do pretty much what you want.
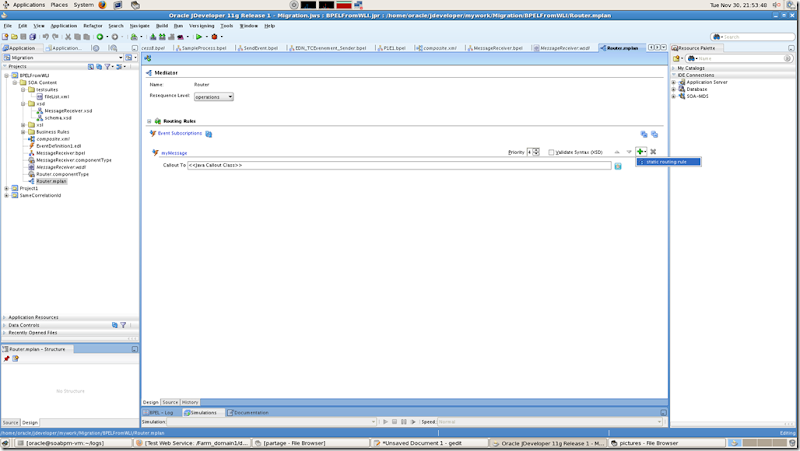
Now we’ve filtered the messages we want to process in our Mediator, we have to define a proper route for each one (out of three).
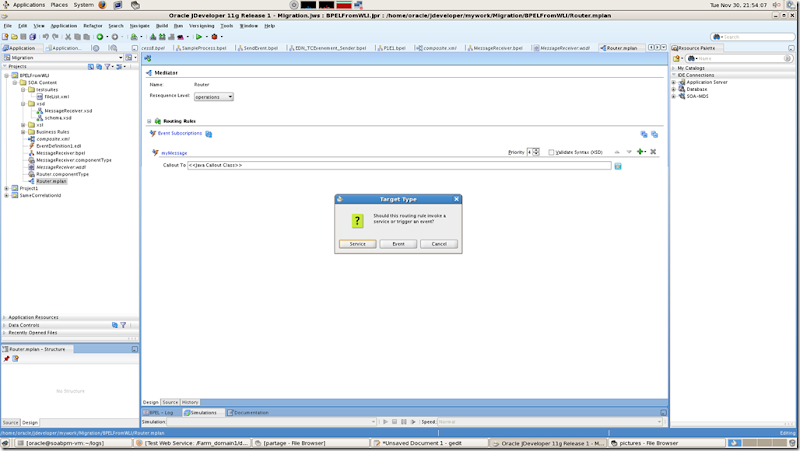
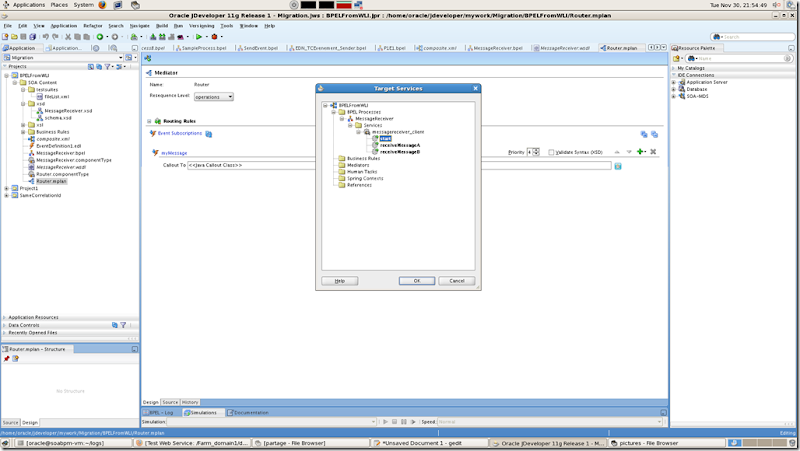
When you create a static routing rule, you have to define if it will invoke a service (partnerLink) or fire an event. In our case, it’s a partnerLink (= a call to a webservice operation, which is one of our BPEL process operation)
Then, we have to select the proper operation, matching the filter we are going to define.
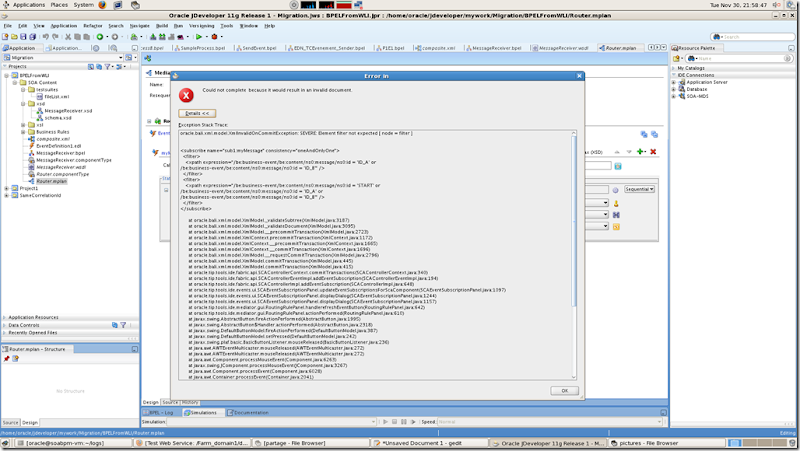
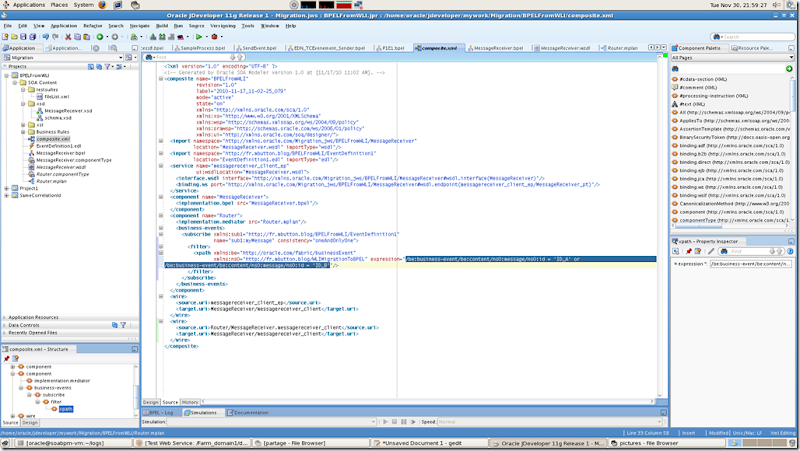
Note : OK, I wanted to show that error because it seems to me that it is a real bug : if you want to update the filter rule, once you’ve already defined, JDev will try to add another filter, which is forbidden. If you take a look at the example below, it tries to add another rule, in addition to the previous version. You may fix that by going in the source and remove the troubling filter.
Anyway, what you have to remember is that once created, the filter needs to be updated directly in the source (composite.xml), if needed. Maybe it’s just the JDev version I worked with, but if you’re using the same Virtualbox appliance as me, you might encounter the same issue.
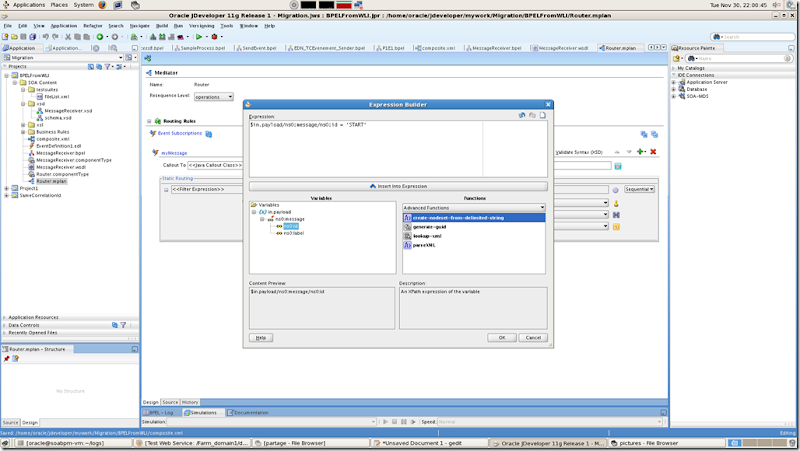
Once you’ve defined what operation was to be called, we need to define what the trigger will be (= define a filter). In our example, I want the “start” branch of my BPEL process to be called when a message, whose ID is ‘START’, is received (pretty logical, huh ?). Just click on the filter icon and you will see a popup like that :
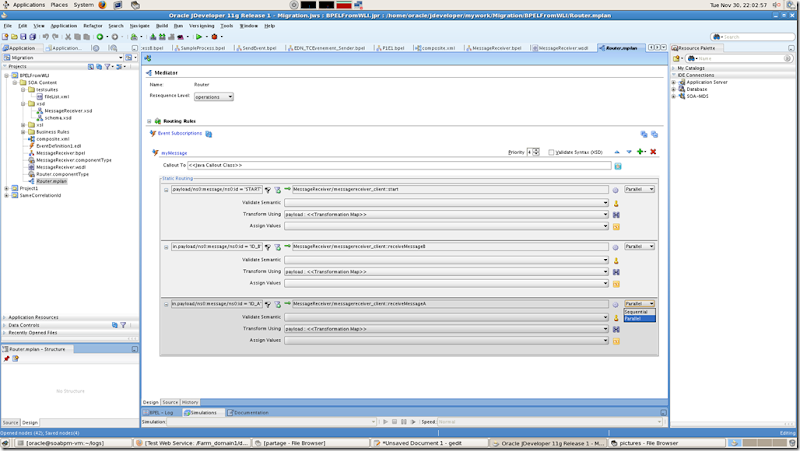
Repeat the step for each message / BPEL branch to be called. Note that I used the mode “Parallel'” rather than “Sequential”. With three rules, it doesn’t really matter. But if you have more than twenty, it could lead to some performance issues : in “Parallel”, one thread is created to execute the checking (one rule = one thread), whereas in “Sequential”, only one thread will perform each rule, one after the other.
Once you are done, note that all the components are now wired in the composite graphical view.
Now, we will add another process, used to push messages on the EDN.
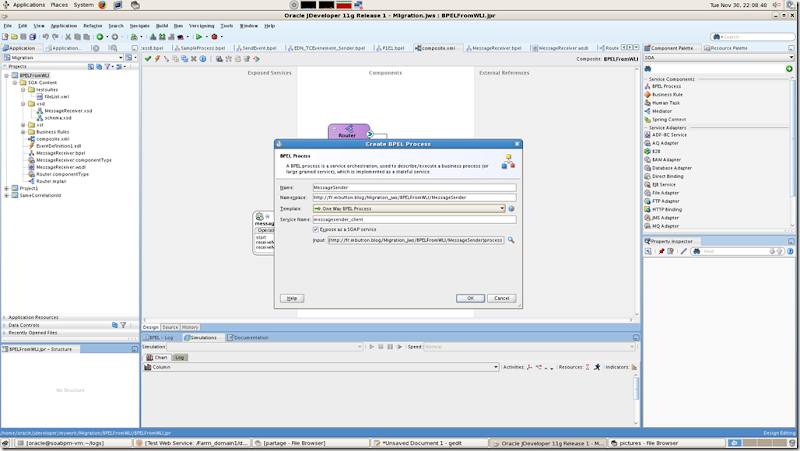
Define a new BPEL process. (“One-way” is the right choice for that process since we are not expecting any message in return).
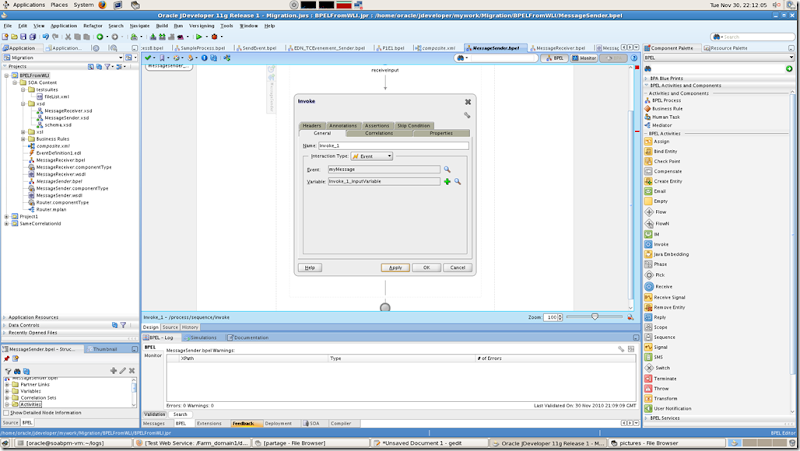
Simply add an “Invoke” activity by drag ‘n’ dropping it just after the activity “receiveInput”. An “Invoke” activity means that the process is making a call, whereas a “Receive” activity means that the process is being called.
In our example, the Invoke activity will publish a message (Event) on the EDN. Just switch “PartnerLink” to “Event” in the dropdown “Interaction Type”.
Look for the event “myMessage” and then, define a variable associated to it (even if we will not use it). Be sure to update the WSDL in order to have the proper message used. (that means you’ll have to declare and import the correct namespace, like you did for the first BPEL process).
From a composite point-of-view, here is the the newly created process, which will help us to send messages over the EDN.
Now, we have the impression that everything is set up : a process which will receive messages (through its mediator) and another which will publish messages. But if you remember what I wrote earlier, you should know that this won’t be enough for this example to work : a correlationSet is missing …
For your messages to be able to reach your instance, you have to define something that bind them together. That’s the role of the correlationSet : you define a common property, whose value is going to be the same.
For instance, on my message, I’ll define a correlationSet on the property “label”. That way, all the messages whose “label” property is the same will be directed to the same BPEL instance(s).
Note : several BPEL instances may have the same correlationSet.
- On the “Receive” node, look for the “Correlations” tab, click on the starred white sheet to create a new correlationSet
- Chose a name, type & alias
- Chose on what message property your correlationSet will rely on
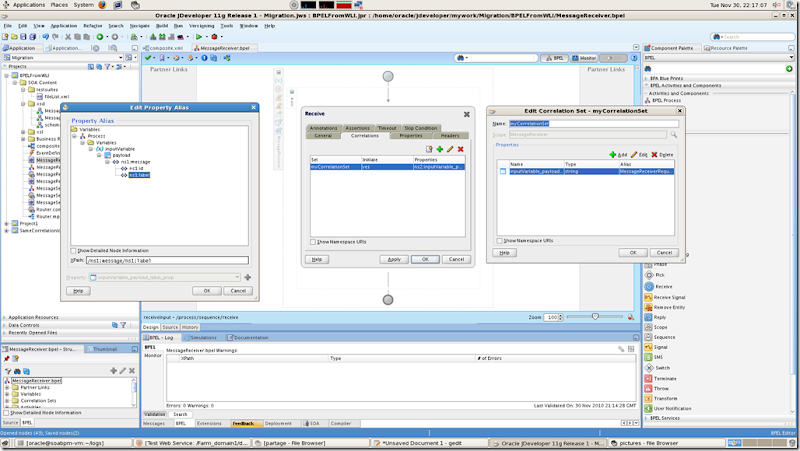
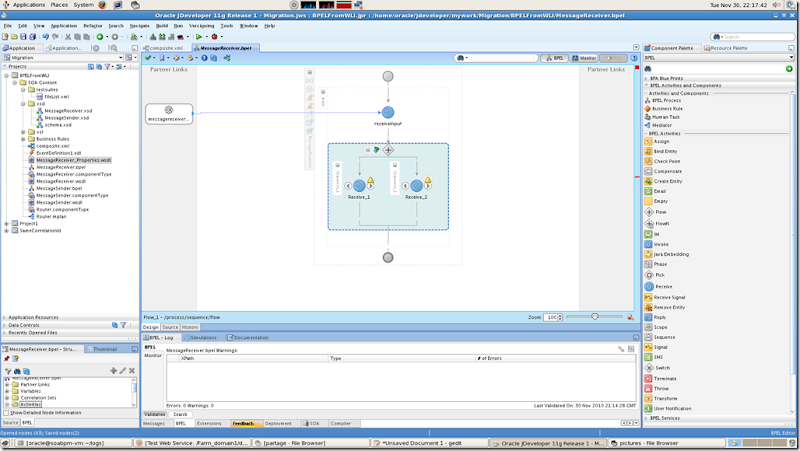
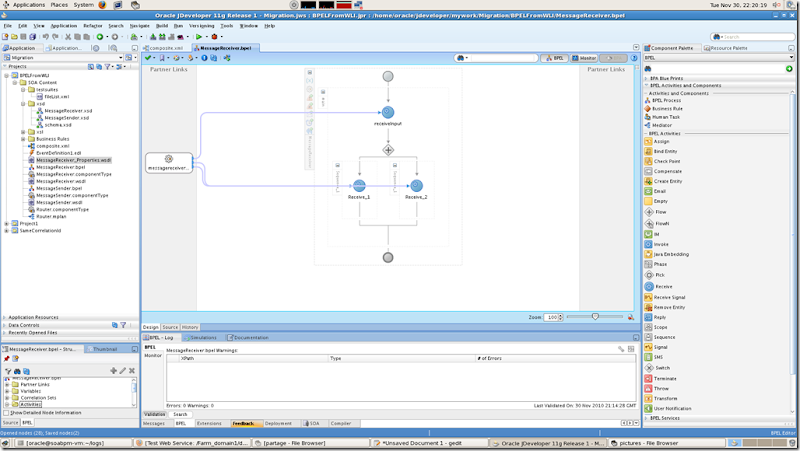
Add a flow element (means its branches will be processed in parallel) and define two branches. In each branch, add a receive activity. Here’s what our BPEL Process should look like.
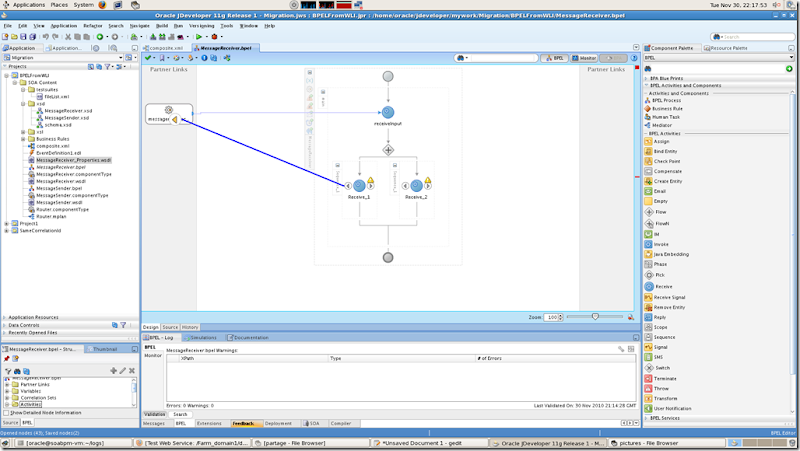
Now, just wire the newly created receive operations to the messageClient.
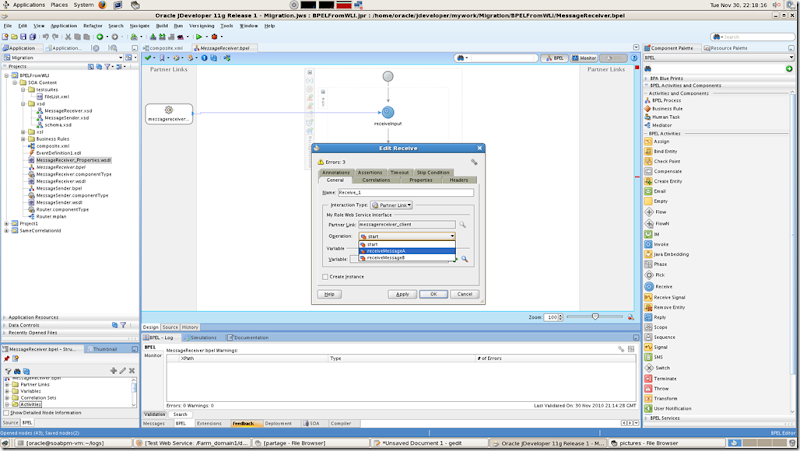
When the wire is drawn, a popup will ask some details about that link. Chose the webservice operation you want your receive activity to be bound to.
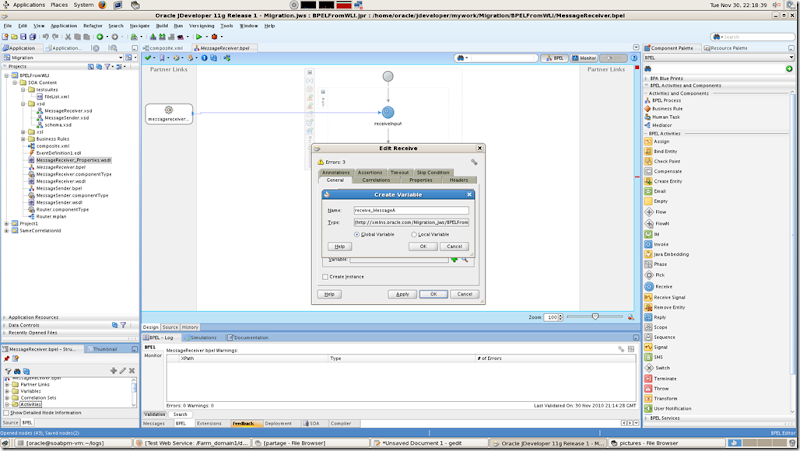
Create a variable that will receive the payload coming from the webservice operation call.
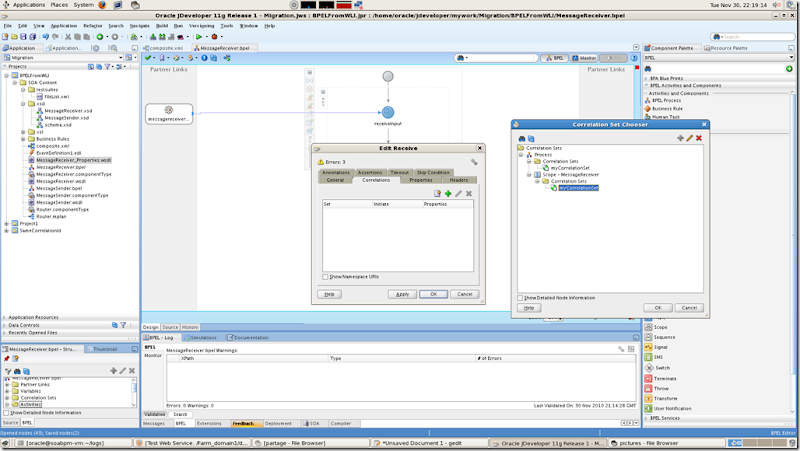
And then, chose the correlationSet you created before. That’s how you define a link between the three messages. Repeat that step for the second operation.
Here’s what our final BPEL Process looks like :
Now we’re ready to have it running.
Start your server and deploy your BPEL project.
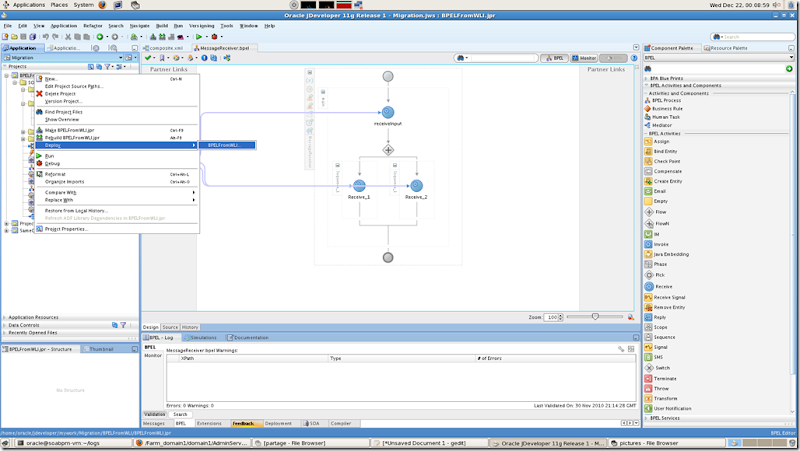
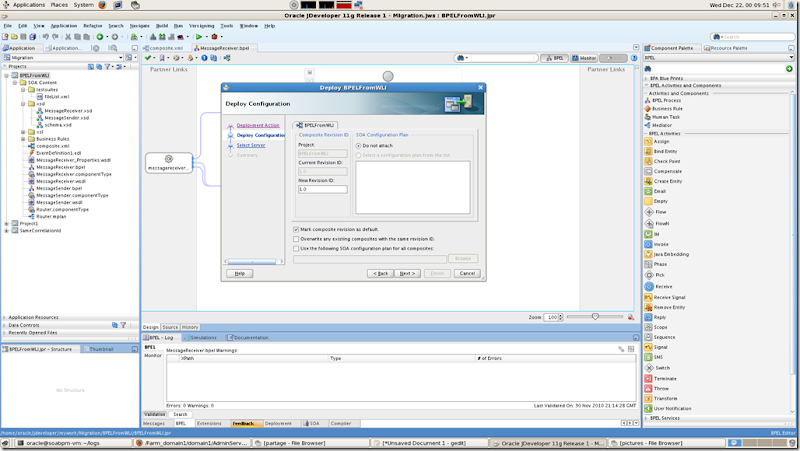
Don’t forget to define the version you want to use for your SOA Project
In the SOA Pane, you should see seomething like
Buildfile: /oracle/jdevhome/jdeveloper/bin/ant-sca-compile.xmlscac:[scac] Validating composite "/home/oracle/jdeveloper/mywork/Migration/BPELFromWLI/composite.xml"[scac] Setting BPELC option 'classpath' to /oracle/jdevhome/jdeveloper/jdev/extensions/oracle.sca.modeler.jar:/oracle/jdevhome/jdeveloper/soa/modules/oracle.soa.fabric_11.1.1/fabric-runtime.jar:/oracle/jdevhome/jdeveloper/soa/modules/oracle.soa.mgmt_11.1.1/soa-infra-mgmt.jar:/oracle/jdevhome/oracle_common/modules/oracle.fabriccommon_11.1.1/fabric-common.jar:/oracle/jdevhome/jdeveloper/soa/modules/oracle.soa.bpel_11.1.1/orabpel.jar:/oracle/jdevhome/jdeveloper/soa/modules/oracle.soa.mediator_11.1.1/mediator_client.jar:/oracle/jdevhome/oracle_common/modules/oracle.mds_11.1.1/mdsrt.jar::/home/oracle/jdeveloper/mywork/Migration/BPELFromWLI/SCA-INF/classes[scac] Setting BPELC option 'classpath' to /oracle/jdevhome/jdeveloper/jdev/extensions/oracle.sca.modeler.jar:/oracle/jdevhome/jdeveloper/soa/modules/oracle.soa.fabric_11.1.1/fabric-runtime.jar:/oracle/jdevhome/jdeveloper/soa/modules/oracle.soa.mgmt_11.1.1/soa-infra-mgmt.jar:/oracle/jdevhome/oracle_common/modules/oracle.fabriccommon_11.1.1/fabric-common.jar:/oracle/jdevhome/jdeveloper/soa/modules/oracle.soa.bpel_11.1.1/orabpel.jar:/oracle/jdevhome/jdeveloper/soa/modules/oracle.soa.mediator_11.1.1/mediator_client.jar:/oracle/jdevhome/oracle_common/modules/oracle.mds_11.1.1/mdsrt.jar::/home/oracle/jdeveloper/mywork/Migration/BPELFromWLI/SCA-INF/classes[scac] WARNING: in Router.mplan: Case "MessageReceiver.messagereceiver_client.start" doesnt have any payload transformation Please make sure source and target message part name are same and of same type. Otherwise, target reference may fail to execute with error message like "Input sourcelike Null" or "Part not found"[scac] WARNING: in Router.mplan: Case "MessageReceiver.messagereceiver_client.receiveMessageB" doesnt have any payload transformation Please make sure source and target message part name are same and of same type. Otherwise, target reference may fail to execute with error message like "Input sourcelike Null" or "Part not found"[scac] WARNING: in Router.mplan: Case "MessageReceiver.messagereceiver_client.receiveMessageA" doesnt have any payload transformation Please make sure source and target message part name are same and of same type. Otherwise, target reference may fail to execute with error message like "Input sourcelike Null" or "Part not found"BUILD SUCCESSFULTotal time: 6 seconds
And in the Compiler Pane, no errors (but maybe a few warnings).
2.2.4) Running the example
Now we’ve compiled & deployed our BPEL processes, it’s time to use them.
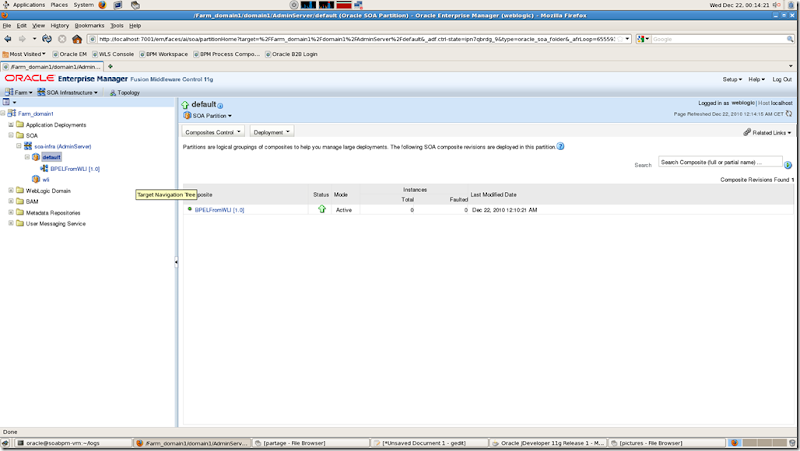
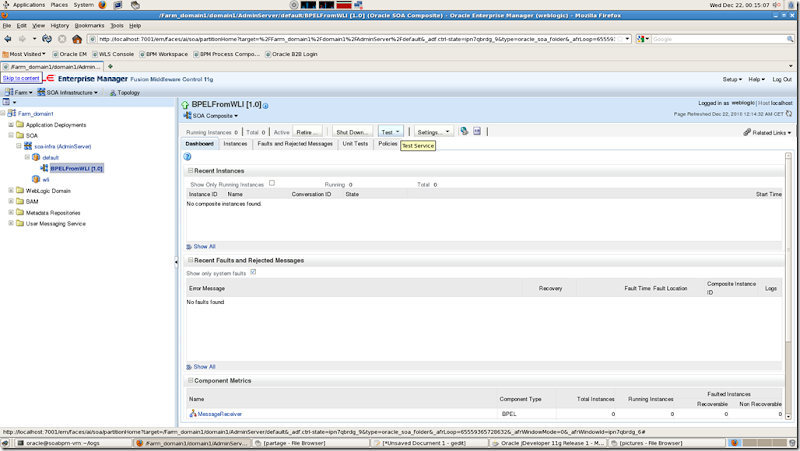
First thing of all, we will test the process that sends messages over the EDN and send a start message.
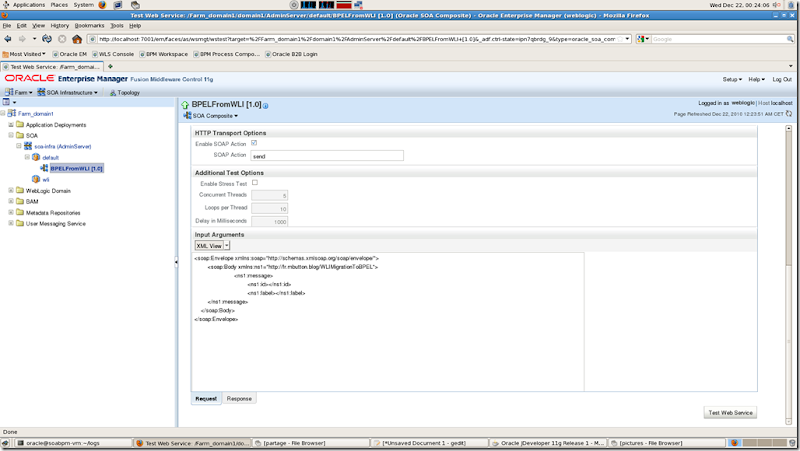
To test a BPEL process, just click on the Test button, just like on the picture below.
Choose the process that sends messages and on the screen, chose to the XML view, that would normally display an empty message. Just complete the payload with the correct values, that is to say ‘START’ in the id field and whatever you want in the label field. Remember that, as we based our correlationSet on that label field, you will have to keep the same value if you want your messages to be routed to the correct instance.
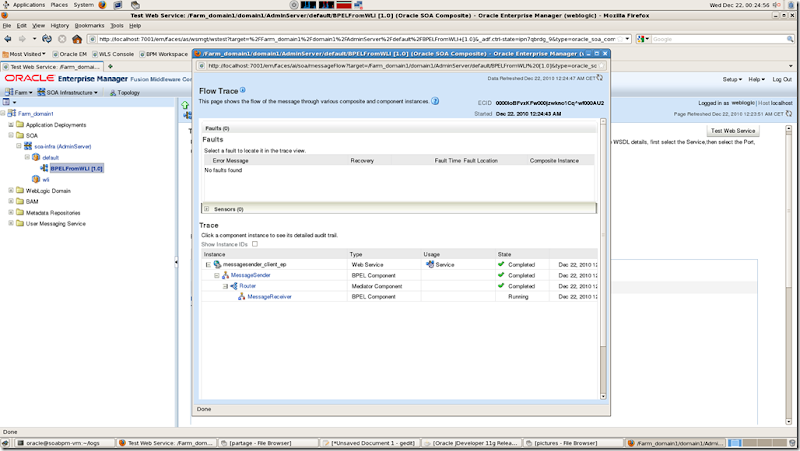
If everything went well, click on the link that allows you to see the details of the call. You should normally see the steps shown below, with the call of the “MessageSender”, the routing by the “Router” mediator and then finally, the process “MessageReceiver” which is running.
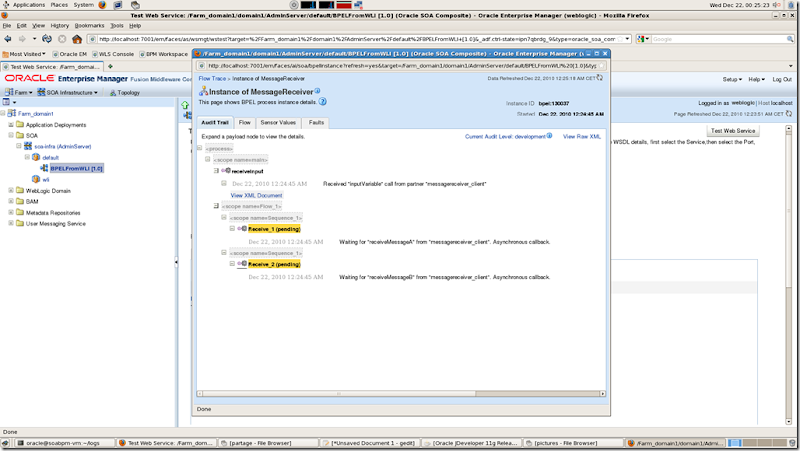
If you click on that last step, you will see that the start branch has been called and that the process is now waiting for two branches (highlighted in yellow) to be called.
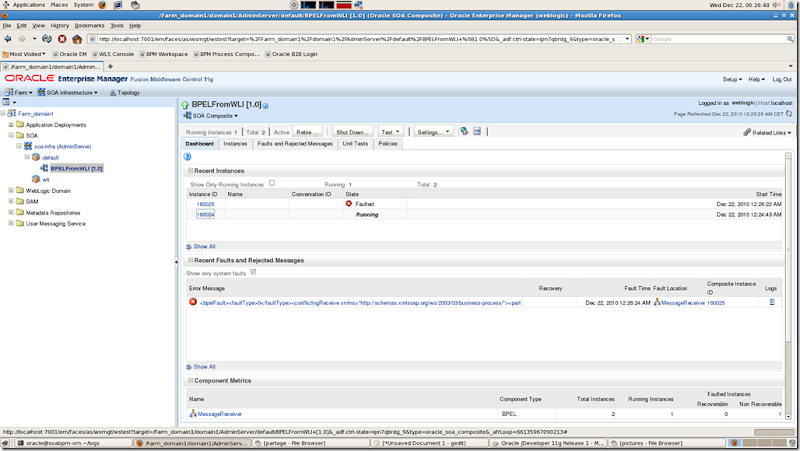
Just for some testing purposes, if you try to trigger the very same message, you’ll end up with a faulted process, whose failure reason is a conflicting receive. Which is absolutely normal, since we based our correlationSet on a field whose value is the same as the first we used to trigger the first process. If you want another process to start, change the value of the “label” field.
Now, if we send a message whose id is one the ids expected (and of course, with the same label), you should see something like the picture below, with a “mid process receive” activity.
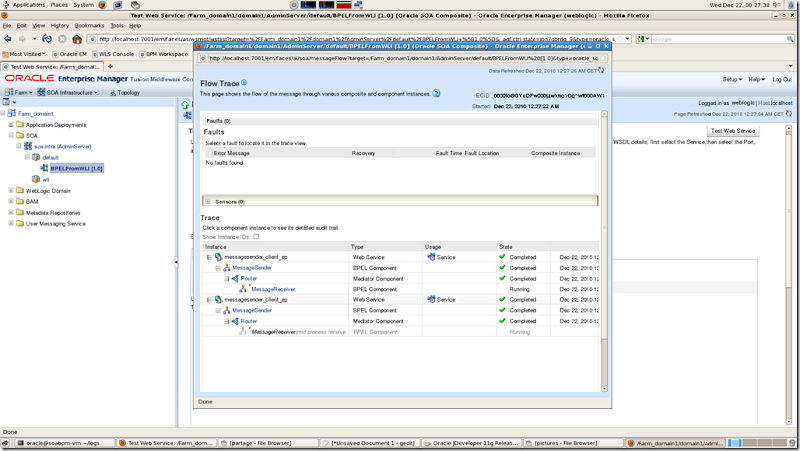
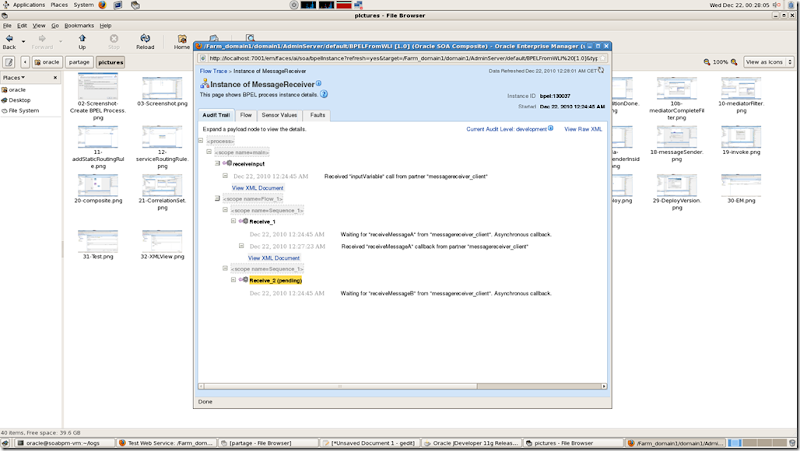
If we take a closer look to that running instance, we now see that the first branch is no longer waiting to be called (= for a message to come).
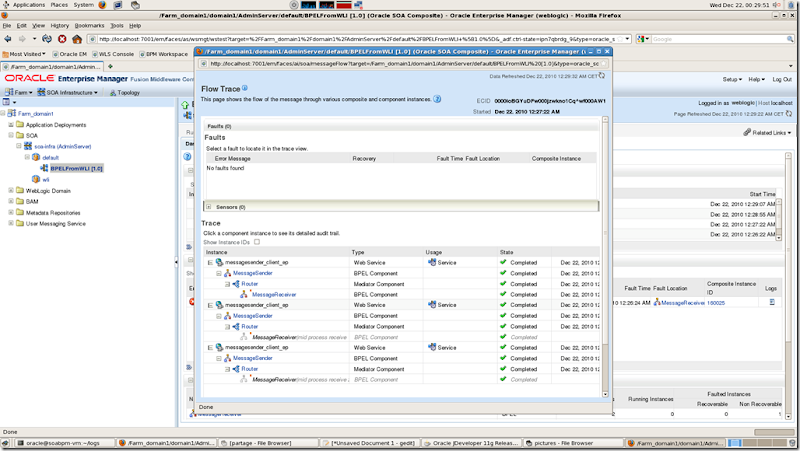
Now, we send the third and last message, whose id is “ID_B” and we can now see that a second “mid process receive” is visible and that all the states of the steps are at “Completed”.
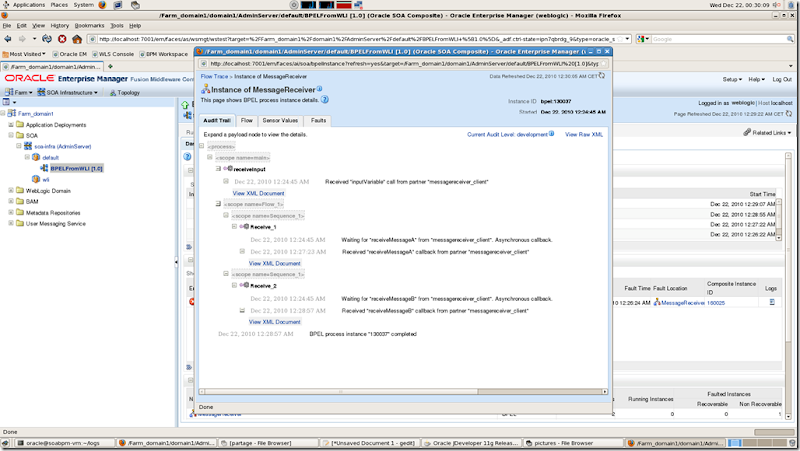
Let’s have a look at the general BPEL instance, and now, we can see that everything has been received and that the instance is now completed.
Well, that’s it. I hope my explanation was clear enough. Else, feel free to ask and I’ll try to answer as accurately and as fast as possible.
In the meantime, if you were to wonder about Oracle products, about the way to migrate WLI projects toward BPEL PM, I invite you to contact Simone Geib (SOA Suite Product Manager) and she’ll try to answer your questions. (Her email address is first_name.last_name@oracle.com)
Ok, to be sure to understand how everything works here, don’t hesitate to play with correlationSets, multiple instance and so on. Once again, you’ve got a perfect VirtualBox appliance to play with !
Enjoy :)
